Draggable Bezier Curve In Vanilla Javascript
02 Feb 2024
02 Feb 2024
I have always loved making things with HTML Canvas. You can do a lot of cool things with it, like an animation of the rotation of planets around the sun. Something that has always been challenging for me is making objects in the DOM or on a Canvas draggable. So, I decided to try to make a Bezier curve with draggable controls.
Let’s start by setting up a canvas. Create an html file with the following content:
<!DOCTYPE html>
<html lang="en">
  <head>
    <meta charset="UTF-8" />
    <meta name="viewport" content="width=device-width, initial-scale=1.0" />
    <title>Bezier Curve</title>
    <style>
      body {
        margin: 0;
        background-color: #1a1a1a;
      }
    </style>
  </head>
  <body>
    <script src="bezier-curve.js"></script>
  </body>
</html>
Next, create a file called bezier-curve.js. Add the following code to it:
const WIDTH = window.innerWidth;
const HEIGHT = window.innerHeight;
const DPR = window.devicePixelRatio || 1;

const canvas = document.createElement("canvas");
const context = canvas.getContext("2d");

canvas.width = WIDTH * DPR;
canvas.height = HEIGHT * DPR;
context.scale(DPR, DPR);
canvas.style.width = `${WIDTH}px`;
canvas.style.height = `${HEIGHT}px`;

context.lineWidth = 3;
context.lineJoin = "round";
context.lineCap = "round";

const root = document.querySelector("body");
root.append(canvas);
We just created a new canvas, scaled its size according to our device’s pixel ratio (DPR) so our drawings will be sharp and not pixelated, set up our drawing style and added the canvas to the DOM. You should now see blank page with a dark background, but no curve yet. Let’s change that.
const start = { x: 50, y: HEIGHT / 2 };
const cp1 = { x: WIDTH / 2, y: HEIGHT - 50 };
const cp2 = { x: WIDTH / 2, y: 50 };
const end = { x: WIDTH - 50, y: HEIGHT / 2 };

window.onload = draw;

function draw() {
  context.fillStyle = "#1a1a1a";
  context.fillRect(0, 0, WIDTH, HEIGHT);

  context.strokeStyle = "#e1e1e1";
  context.beginPath();
  context.moveTo(start.x, start.y);
  context.bezierCurveTo(cp1.x, cp1.y, cp2.x, cp2.y, end.x, end.y);
  context.stroke();
}
You should now see something like this:
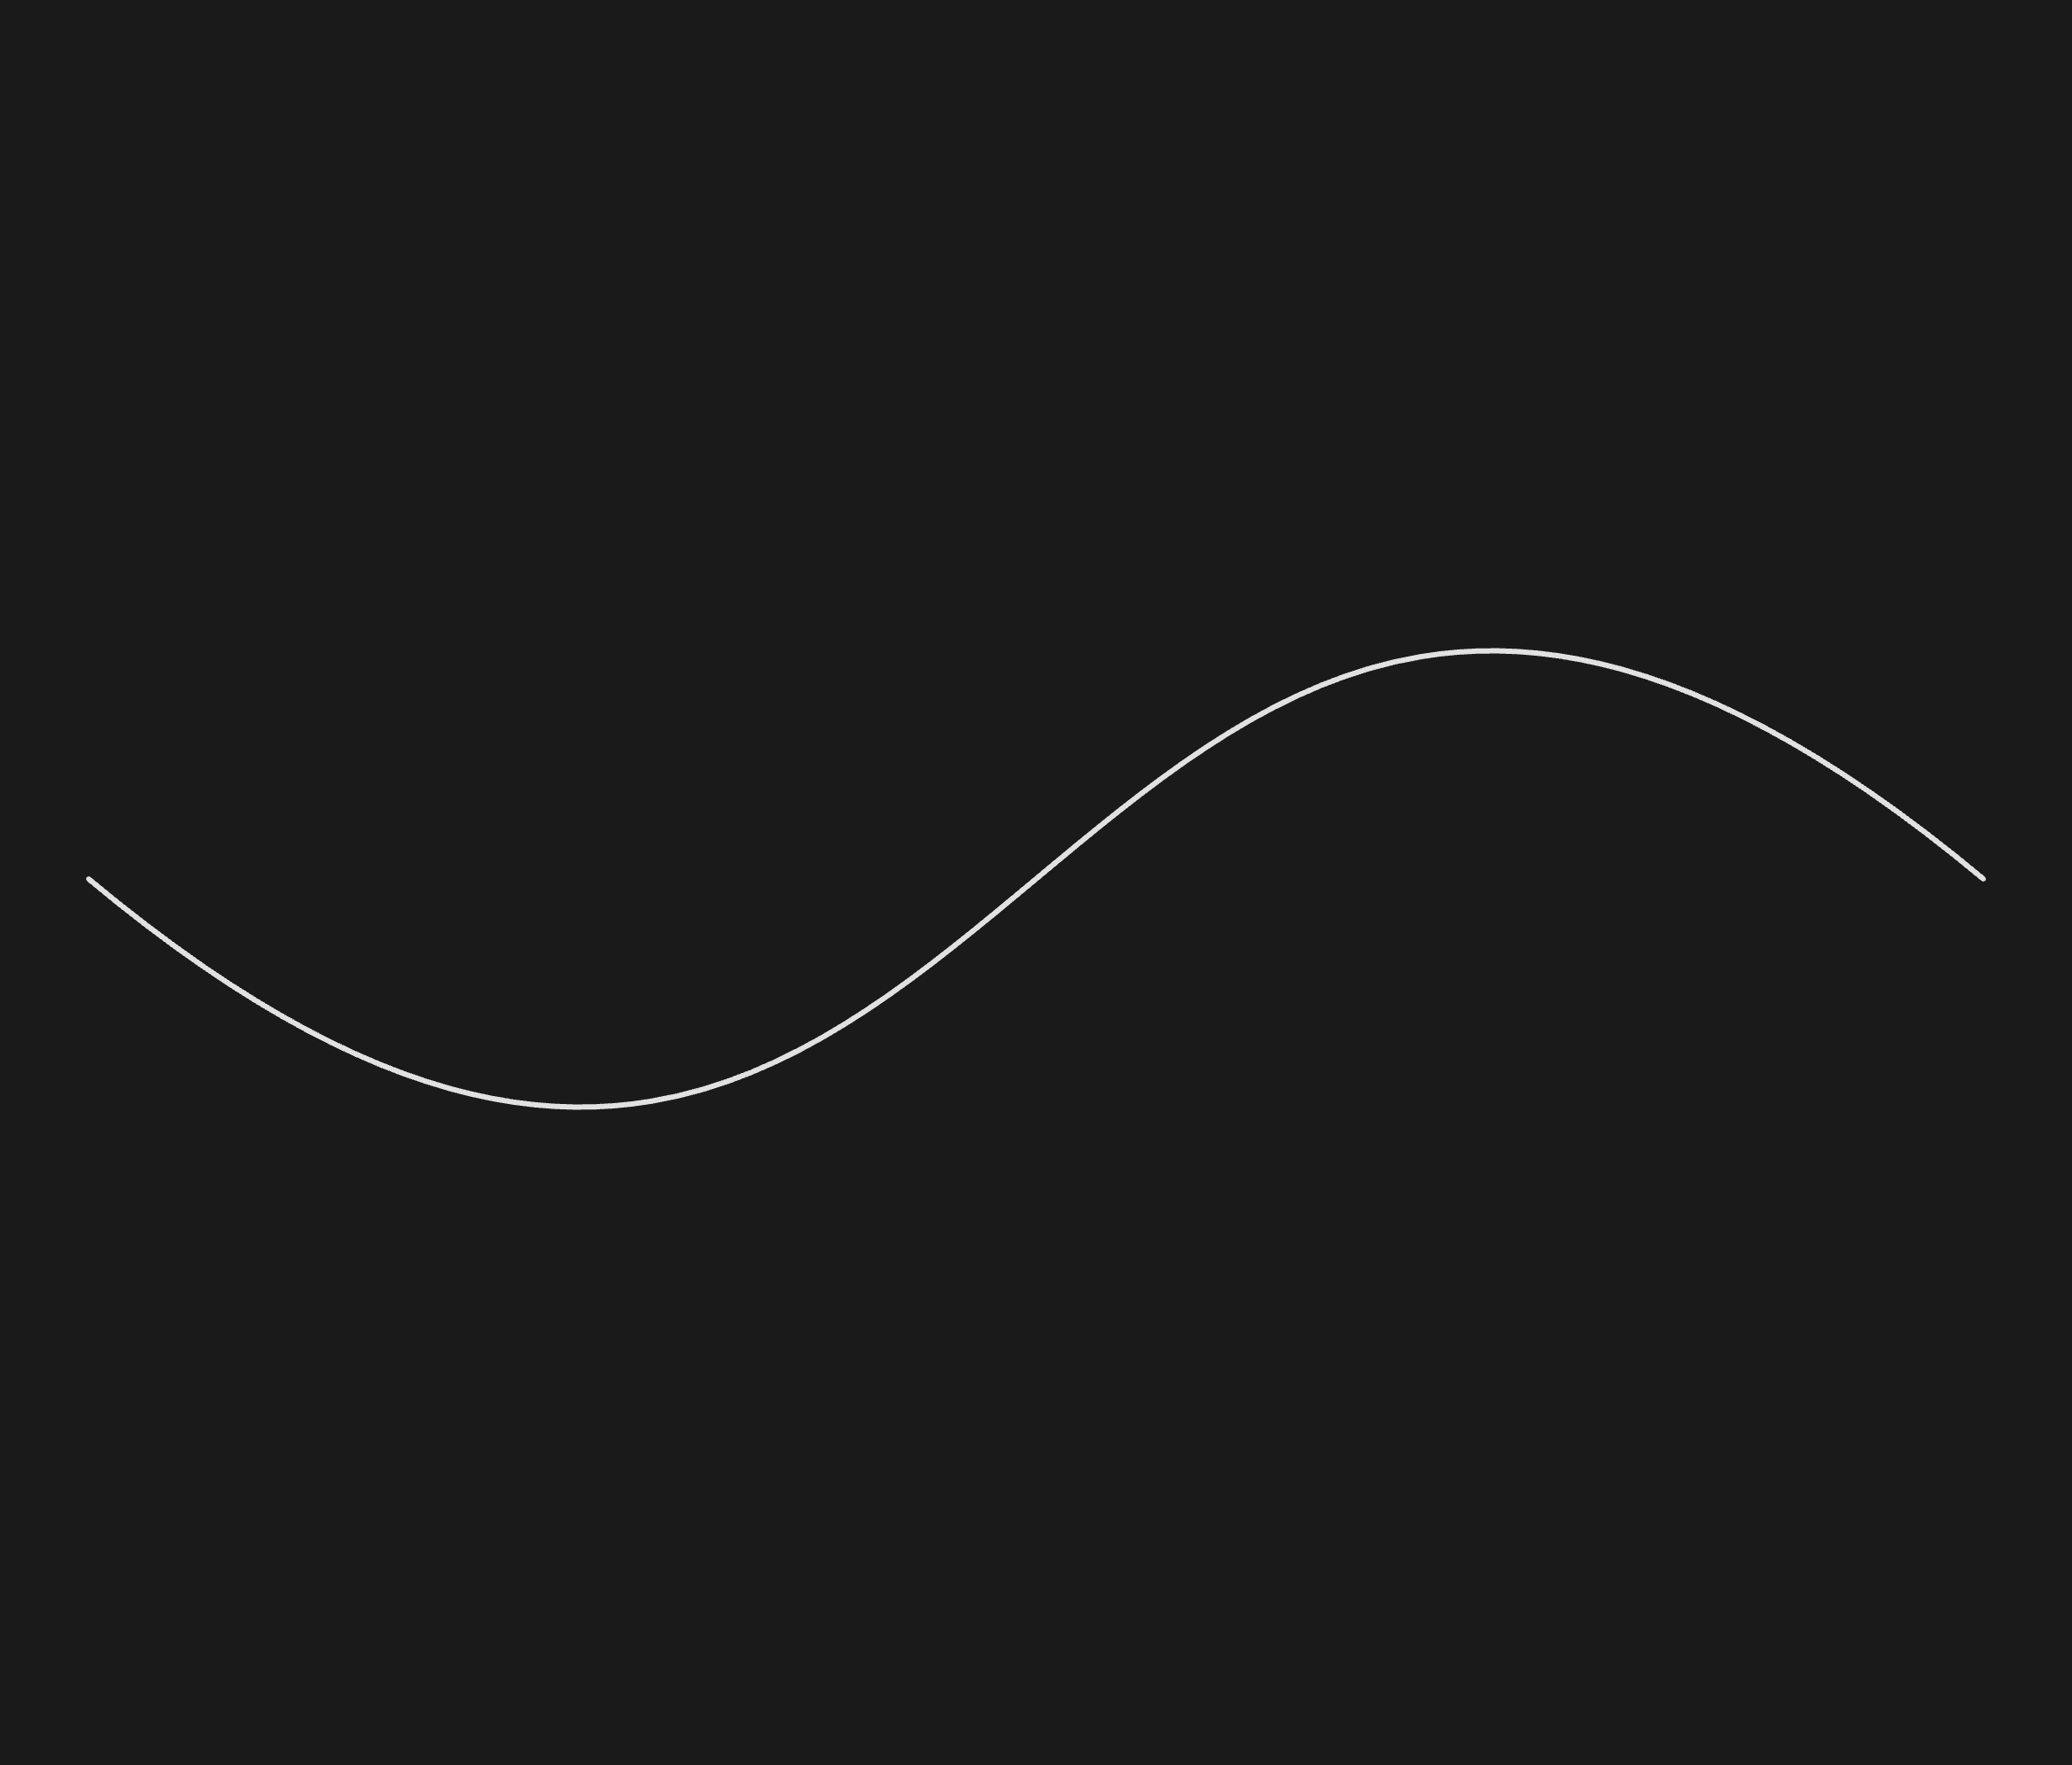
This is already starting to look pretty cool! The curve is visible and it is being drawn based on some coordinates. First, we move to the starting point. Then we draw the curve based on three points: control point 1, control point 2 and the end point.Control point 1 controls the curve at the start of the line, and control point 2 controls the curve at the end of the line. Don’t worry too much about that right now, you’ll see it work in a bit. You might already be able to figure out how to make the curve move based on this code. For example, what would happen if we changed these coordinates? What if we used the mouse to drag the control points or start and end point around? Let’s make that happen.
// earlier code

const mouse = {
  x: 0,
  y: 0,
};
const circleSize = 100;
let = true;
let mouseDown = false;

document.addEventListener("mousemove", (e) => {
  mouse.x = e.clientX;
  mouse.y = e.clientY;
});

document.addEventListener("mousedown", (e) => {
  mouseDown = true;
});

document.addEventListener("mouseup", (e) => {
  mouseDown = false;
});
We added a variable to keep track of the mouse coordinates to compare them to the coordinates of the line points that we want to be able to drag. Also, we added some event handlers to know when the mouse is being pressed. Let’s continue.
function draw() {
  // earlier code

  drawCircle(start);
  drawLine(start, cp1);
  drawCircle(cp1);
  drawCircle(end);
  drawLine(end, cp2);
  drawCircle(cp2);

  if (mouseDown) {
    if (collision(mouse, start)) {
      start.x = mouse.x;
      start.y = mouse.y;
    } else if (collision(mouse, cp1)) {
      cp1.x = mouse.x;
      cp1.y = mouse.y;
    } else if (collision(mouse, cp2)) {
      cp2.x = mouse.x;
      cp2.y = mouse.y;
    } else if (collision(mouse, end)) {
      end.x = mouse.x;
      end.y = mouse.y;
    }
  }
}
Now we can clearly see the start, control and end points, and how they create the curved line. The coolest part is, we can also drag them to move the curve around and turn it into any shape we want! Let’s finish the code to see the magic happen.
function drawCircle(pos) {
  context.fillStyle = "#e1e1e1";
  context.beginPath();
  context.arc(pos.x, pos.y, circleSize / 2, 0, 2 * Math.PI);
  context.fill();
}

function drawLine(from, to) {
  context.strokeStyle = "#e1e1e1";
  context.beginPath();
  context.moveTo(from.x, from.y);
  context.lineTo(to.x, to.y);
  context.stroke();
}

function collision(a, b) {
  const result =
    a.x >= b.x - circleSize &&
    a.x <= b.x + circleSize &&
    a.y >= b.y - circleSize &&
    a.y <= b.y + circleSize;
  return result;
}
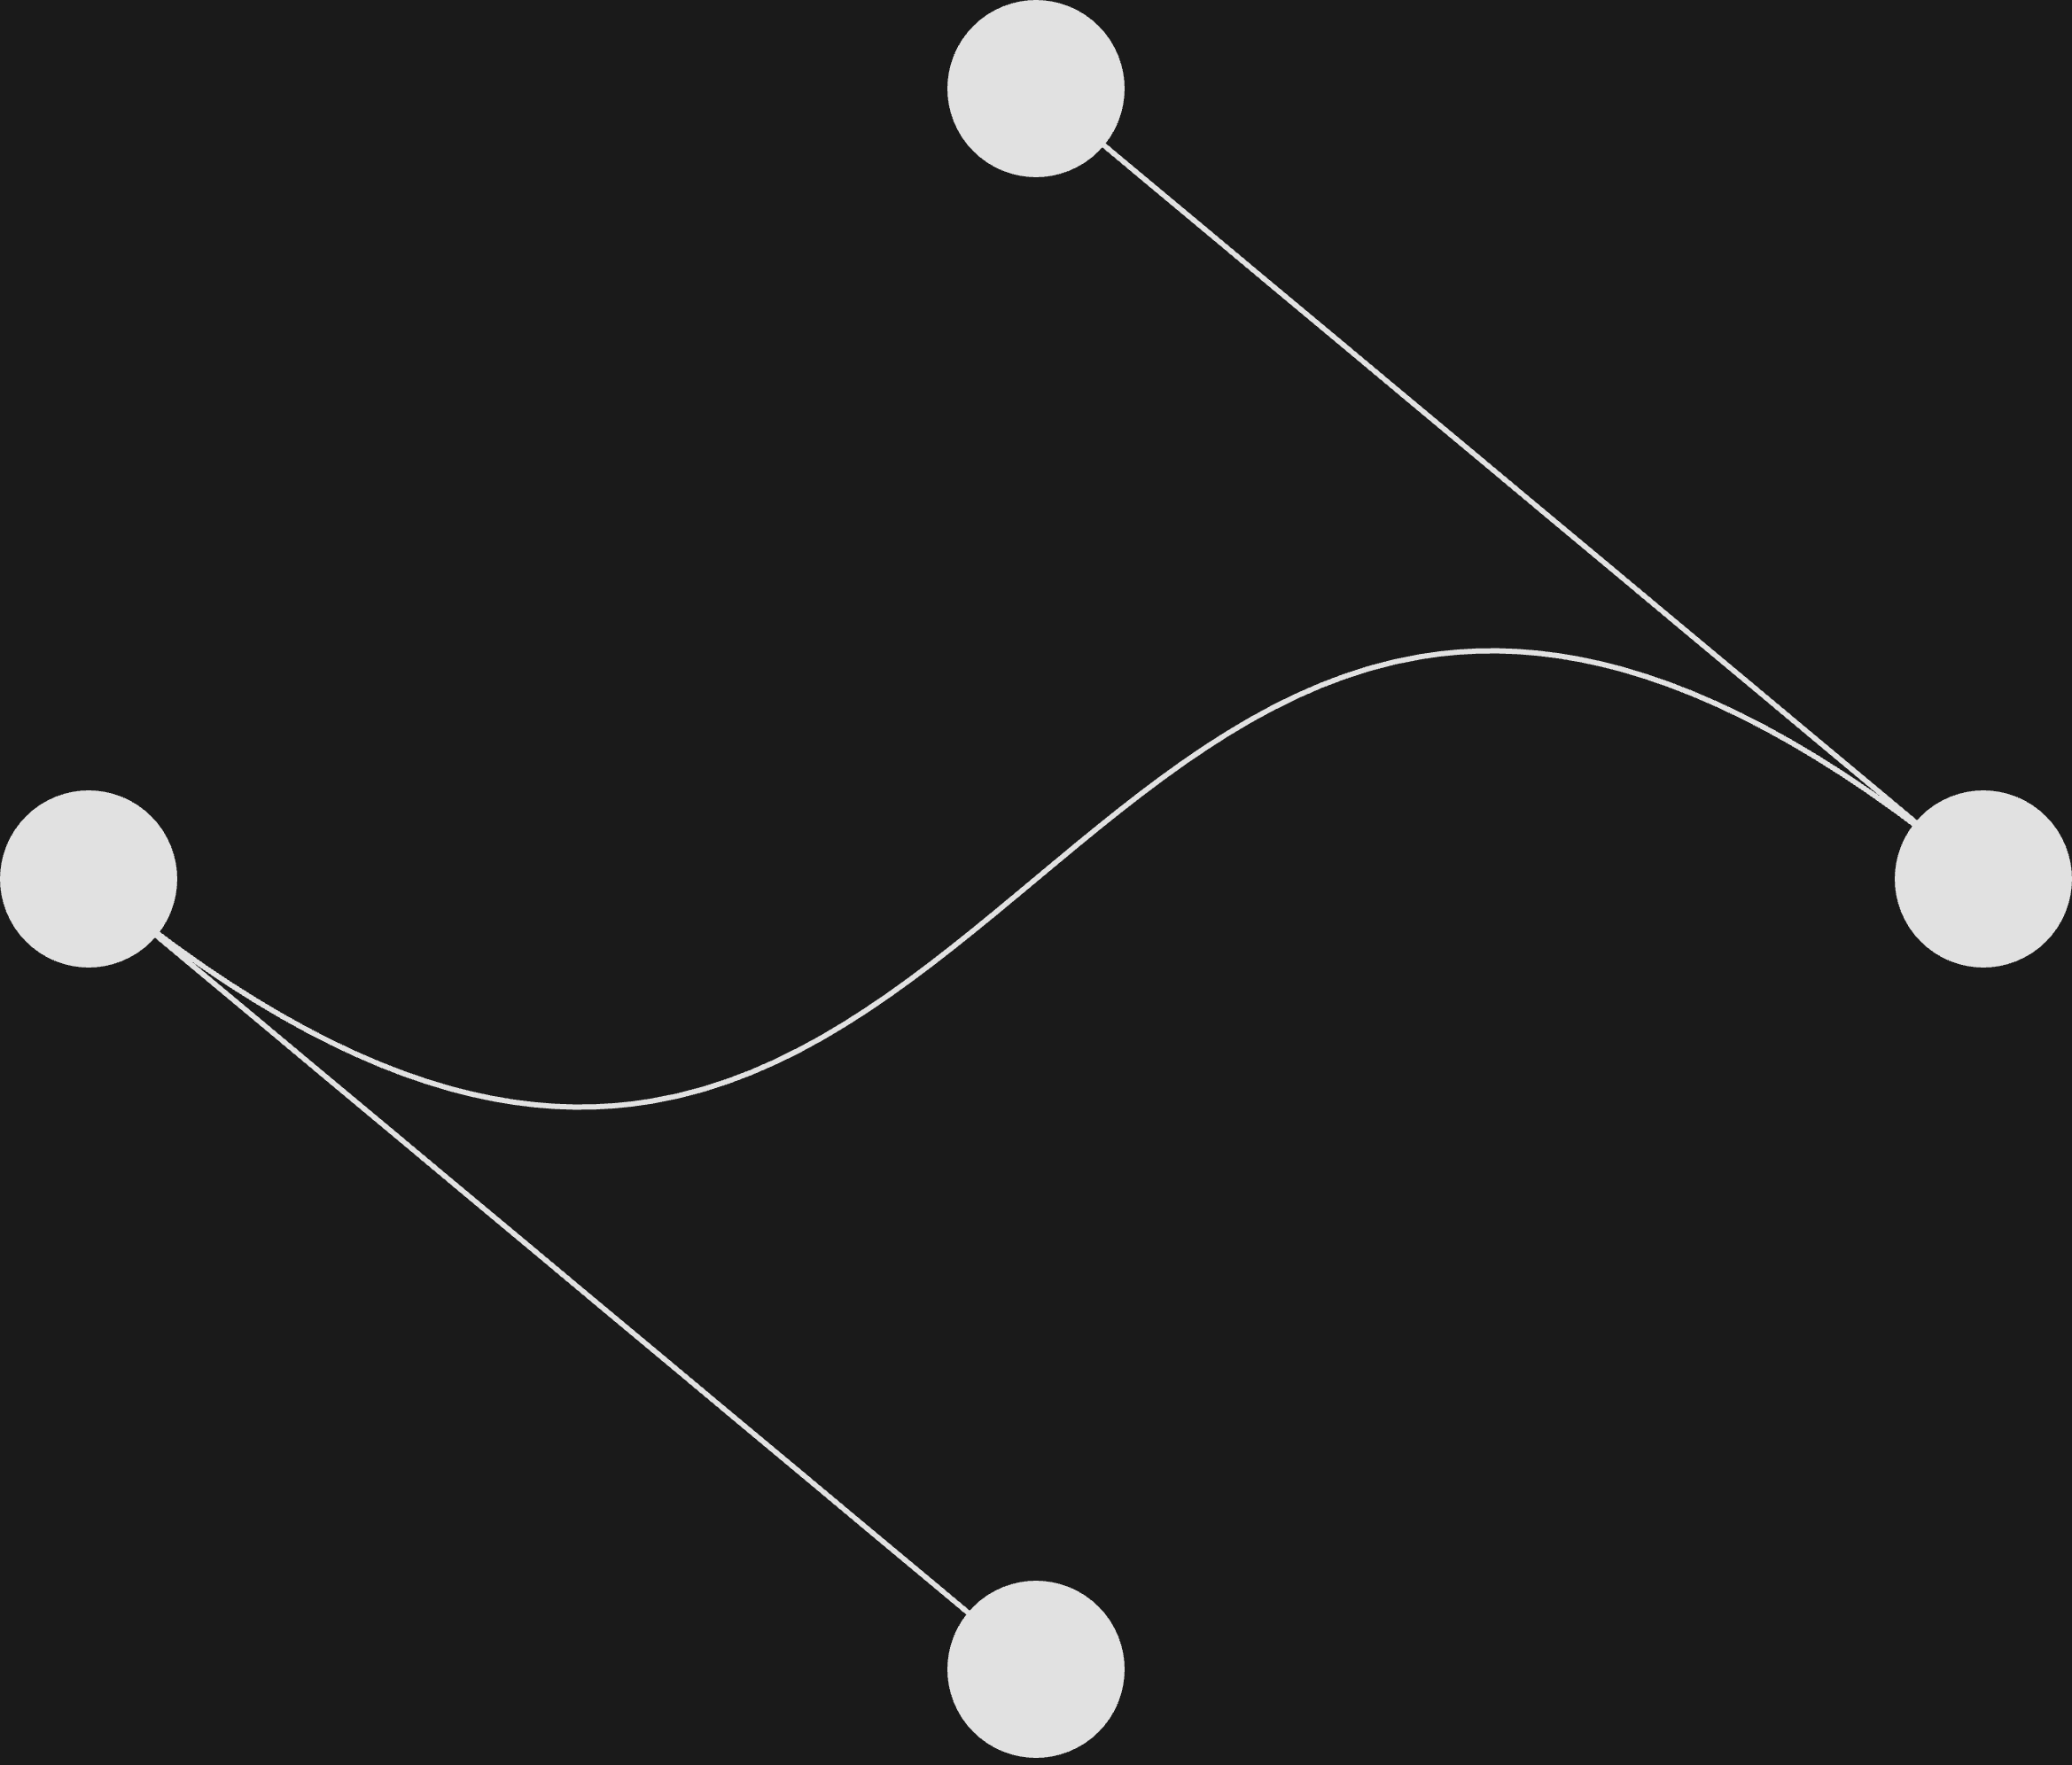
Look at that! And you can move it around!
I hope you enjoyed reading this post as much as I enjoyed making it! The full code can be found here. Thanks for reading!